A retaining wall with capstone has a finished unit covering its top course. That cap helps shed water, protects exposed block edges, and gives the wall a clean profile. When caps loosen, the cause may be poor bonding, movement, impact, or a deeper drainage problem.
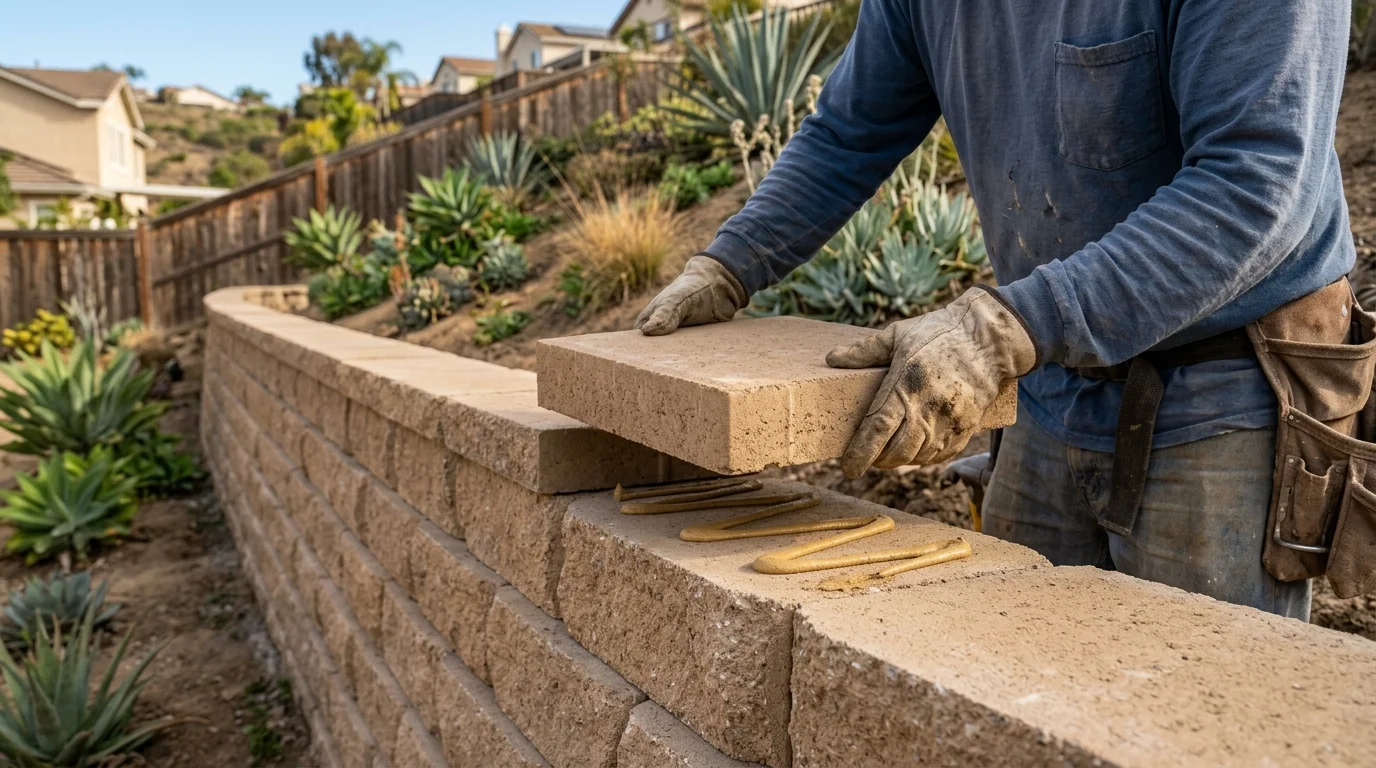
A cap is a weather detail, not decoration
Capstones finish the top of a retaining wall, but they aren’t just trim. They cover the upward-facing surface of the top course. That surface receives direct rain, irrigation spray, dirt, and foot traffic from nearby landscaping.
A well-seated cap gives water a path away from the joint below. Its edge can also help keep runoff from tracking down the wall face. The exact shape depends on the wall system. Some caps are flat. Others have a crown, slope, overhang, or formed edge.
The cap still can’t replace drainage behind the wall. It doesn’t relieve water pressure in the retained soil. It also doesn’t correct missing backfill drainage or a blocked outlet. Think of it as the roof edge, not the whole roof.
Capstone choices affect appearance as well. Color, texture, thickness, and joint layout can tie the wall into steps or paving. That makes caps an important part of decorative retaining wall design, but appearance comes after fit and water control.
Look at the wall from both sides before choosing a replacement cap. The top course may be level even when the yard slopes. It may also step down in measured increments. A cap that looks right from the lawn can appear uneven from the street.
Check how the existing cap meets columns, stairs, fences, and corners. These transitions often reveal whether a standard unit will fit. They also show where field-cut pieces might be needed. The wall-system manufacturer’s instructions should guide the final cap type and attachment method.
Adhesive, overhang and the drip edge
A cap needs full, stable contact with the course below. Dirt, loose grit, old adhesive, and uneven block can prevent proper seating. A new adhesive bead can’t correct a rocking cap or a damaged top course.
Segmental wall systems commonly use compatible masonry adhesive. Mortared masonry may use a different cap detail. The product manufacturer should identify the approved bonding method, surface preparation, and curing conditions. Don’t substitute an indoor adhesive or assume every masonry product bonds the same way.
Adhesive placement matters too. Too little can leave unsupported areas. Careless placement can also squeeze material onto the visible face. The installer should follow the cap and adhesive manufacturers’ directions instead of relying on one universal bead pattern.
The overhang is the distance a cap projects beyond the wall face. A consistent overhang creates a straight visual line. It can also move runoff beyond the face joint. There isn’t one correct dimension for every block system, so the cap shape and manufacturer’s layout control that decision.
Some caps have a groove or shaped underside near the outer edge. This detail helps water separate from the unit instead of curling underneath. Other cap systems rely on their profile and projection. A flat unit without a formed groove needs careful placement so water isn’t directed into the bond line.
Dry-laying the first several units exposes fit problems before adhesive is applied. It also lets the installer check corners, end pieces, and joint spacing. On segmental block walls, the selected cap should be compatible with the wall system rather than chosen by color alone.
Why caps pop off first on a wall with a drainage problem
A loose cap is an observation, not a diagnosis. Caps can release after impact, surface contamination, incompatible adhesive, or movement below them. Several loose caps together deserve a closer look at the wall and surrounding drainage.
Water behind a retaining wall doesn’t escape through the cap. It needs a drainage route designed for the wall. When that route is missing, blocked, or damaged, moisture may appear at joints or along the face. Soil movement can also disturb the top course and break the cap bond.
Watch the pattern. One loose unit beside a gate may point toward repeated contact. A line of displaced caps above widening block joints suggests movement below the finish layer. White residue, wet joints, soil washing from openings, or persistent damp areas can add context. None of those signs alone identifies the cause.
Don’t glue a cap back down before checking its seat. Pressing it into fresh adhesive can hide a rocking block without correcting it. It can also make later inspection harder. The top course should be checked for cracks, displacement, and missing material first.
Surface water deserves attention as well. Downspouts, irrigation, and paving can send water toward the retained side. Changing that flow may require more than cap repair. Our guide to retaining wall waterproofing and drainage explains why face treatments and caps don’t replace drainage behind the wall.
Inside City of San Diego limits, the City’s standard masonry-wall design has a specific drainage assembly. It calls for drainage along the wall, including a perforated pipe and gravel layer, within that standard design’s limited scope. That detail isn’t a universal repair prescription. The standard design only covers qualifying masonry walls and excludes sites or loads outside its criteria.
If caps loosen again after a sound repair, ask a retaining wall contractor to inspect the wall. Repeated movement may be coming from the course below, not the cap itself.
Seating caps on a curve or a stair
Curves expose small layout errors quickly. A rectangular cap placed on a tight radius can create wide joints at one edge and pinched joints at the other. Caps made for curves, tapered units, or carefully cut pieces can produce a cleaner fit.
The layout should be tested without adhesive first. Set enough units to see how the joints repeat across the curve. Adjusting several pieces slightly often looks better than forcing one narrow filler into the final opening.
Cuts need stable bearing. A pointed sliver may look acceptable from above but leave little contact underneath. The installer should avoid pieces that can’t sit securely or follow the wall system’s minimum-unit guidance. Cut faces may also need orientation away from the main viewing side.
A stair-step wall presents another issue. Each drop creates an exposed end and a change in elevation. Caps should meet that transition without leaving a rocking corner or an open pocket that collects debris. The end detail may require a finished cap, corner unit, or field cut.
Joint alignment affects the finished look. On straight runs, repeated joints can create a strong line. On curves, strict alignment may produce awkward gaps. The cap manufacturer’s pattern should take priority, especially when the units are shaped for a specific radius.
Corners should be laid out from both directions. Starting at one end and discovering a narrow piece at the corner wastes material and creates a weak-looking transition. Dry placement lets the installer balance cuts before bonding begins.
Caps near stairs or walking surfaces also deserve careful inspection. A loose unit in that location can move under contact. Keep people away from an unstable area until the cap and the supporting course have been evaluated.
Replacing caps without rebuilding the wall
A cap-only repair makes sense when the wall remains aligned and the damage stays at the top. The contractor can remove loose units, clean the bearing surfaces, check the top course, and install compatible replacements. Matching an older color or texture may still be difficult.
Start by documenting the existing layout. Photos help preserve overhang, corner patterns, and step transitions. Numbering reusable caps can also prevent confusion when units vary slightly across the run.
Removal needs restraint. Aggressive prying can chip the top course or damage adjacent caps. Old adhesive must be removed according to the material and product guidance. The goal is a stable, clean seat without grinding away sound block.
Replacement becomes more involved when the top course has shifted. Cracked block, widening joints, leaning faces, or soil loss shouldn’t be covered with new caps. Those conditions call for an inspection of the wall, drainage, and retained slope. The answer may still be a limited repair, but the cap isn’t the place to decide that.
Permit scope matters when a repair grows into reconstruction. Inside City of San Diego limits, Information Bulletin 220 lists several building-permit triggers. They include walls over three feet from the top of the footing to the highest wall point. Surcharge loads, certain sloping backfill, flammable liquids, and qualifying tiered-wall conditions are separate triggers.
Those City rules don’t govern incorporated cities such as Chula Vista, Oceanside, or El Cajon. Unincorporated County areas also follow different requirements. Confirm the property’s jurisdiction, then check with its building department before expanding the work.
A contractor’s license can be checked through the CSLB Check A License tool. Search by license number, business name, or contractor personnel name. Match the wall material and project scope against the contractor’s classification.
When to call us
Call when caps keep loosening, the top course has moved, or water is appearing around the wall. Those signs need inspection before another cap is bonded in place. Call us at (858) 400-4639 and we’ll connect you with a licensed local retaining wall contractor.